Download Sample Access File:
Car Rental Database (for Access 2010 and up)
This is an example file of Car Rental Database. It is the basic of rental database, but you can add as many more fields or tables as you want. The Admin User can add new vehicles, new users, new customers, and other information. The regular user can reserve a vehicle, customer, and rental. The rental process will start with finding the available vehicle then select the vehicle to reserve or rent.
Highlight functions or features in this sample file include:
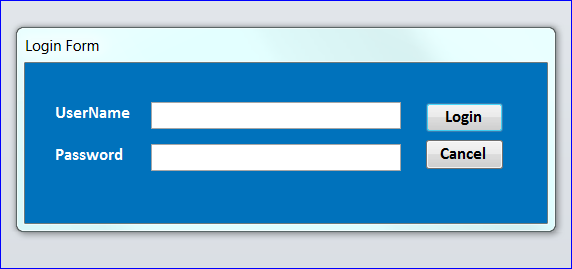
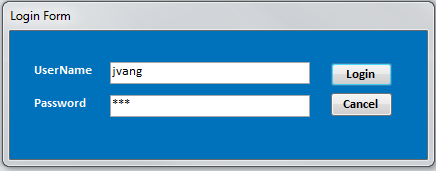
#1 Login Form
This form is first loaded when the program is opened. It asks user to enter UserName and Password. If both UserName and Password are correct then it will open the MainMenu Form. You can set it to open any form as you want on this Login Form in your program.
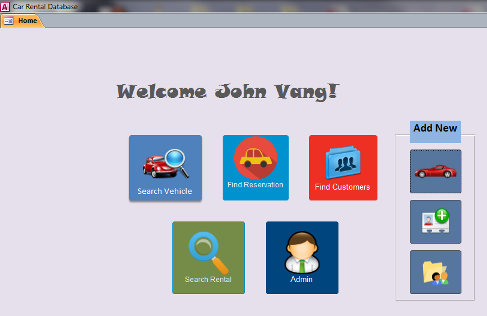
#2 Main Menu Form
The Main Menu Form provides several buttons to open different forms as listed below. The details of each form will be explained below.
- Search Vehicle button
- Find Reservation button
- Find Customers button
- Search Rental button
- Admin button (for Admin only)
- Add New Vehicle button (for Admin only)
- Add New User button (for Admin only)
- Add New Customer button
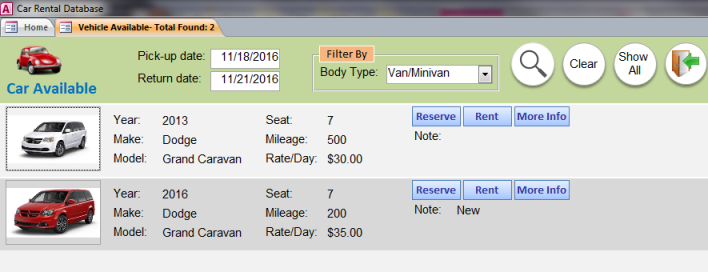
#3 Search Available Vehicle Form
This form is used to search for the available cars to reserve or rent. The pickup date and return date is needed to find the available cars. The available cars are determined by the cars that have an Active status, are returned from renting, and not reserved by anyone during the pickup date and return date. If we want to reserve this car on that date, but it is already reserved on that date by someone, then that car is considered not available. This form provides the following buttons or functions:
- Search for the available vehicle with a criteria from the pickup date and return date
- Filter the result by the body type of vehicle like Sedan, Van/Minivan, truck, etc.
- Clear the criteria and result
- Show all records from the result of searching
- A button “Reserve” selects the vehicle and opens the Reservation Form to reserve a car
- A button “Rent” selects the vehicle and opens the Rent Form to rent a car
- A button “More Info” selects a vehicle and opens the Vehicle Info Form to view the information for that car
- Close form
#4 Vehicle Information Form
After clicking on the Search icon, the list of vehicles that are available to reserve or rent will display. The More Info button will open the detail information form for that vehicle. Each vehicle on the list has its own button and will display the detail for each selected vehicle as shown below.

#5 Reservation Form
After clicking on the Search icon, the list of vehicles that are available to reserve or rent will display. The Reserve button will open the Reservation form for the user to make a reservation.
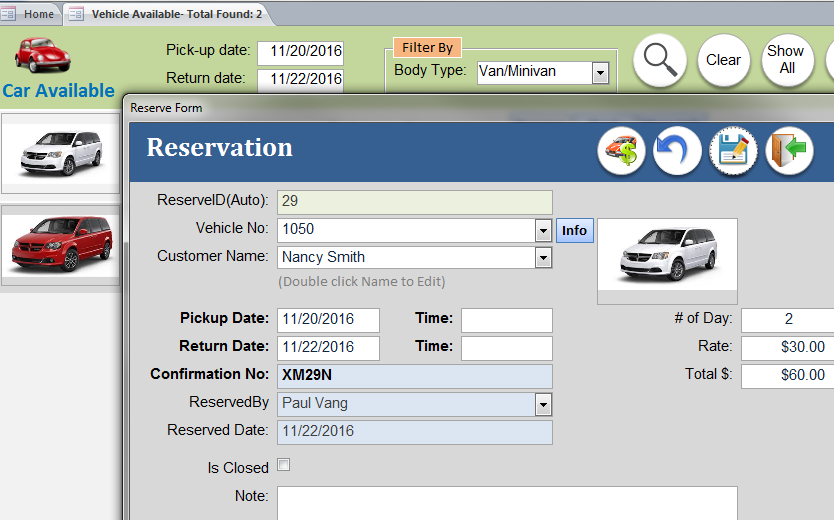
How it Works
- The car information such as Vehicle#, Pickup date, Return date, rate per day will be transferred from the Search Form.
- The Undo icon
 is provided to cancel the reservation or undo any changes.
 - After select customer then click Save icon
 , the information will auto update the Confirmation #, ReservedBy the logged-in user, and reserved date.
 - The Confirmation number is the combination of the random letter of two letters in the front and one letter in the back of a ReservedID.
- The Is Closed box will stay open until the Rent icon is clicked to rent out. The user can manually check it if want to cancel the reservation.
- The Note section is provided for the user to put any message regarding this reservation including the reason of cancel.
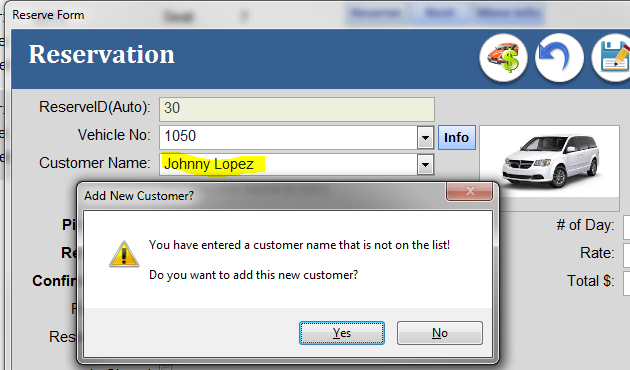
- If the customer name is not on the list then the user can able to add a new customer after click Yes on a pop-up message.
#6 Rent Vehicle Form
After clicking on the Search icon, the list of vehicles that are available to reserve or rent will display. The Reserve button will open the Rent form for a user to rent out the vehicle.
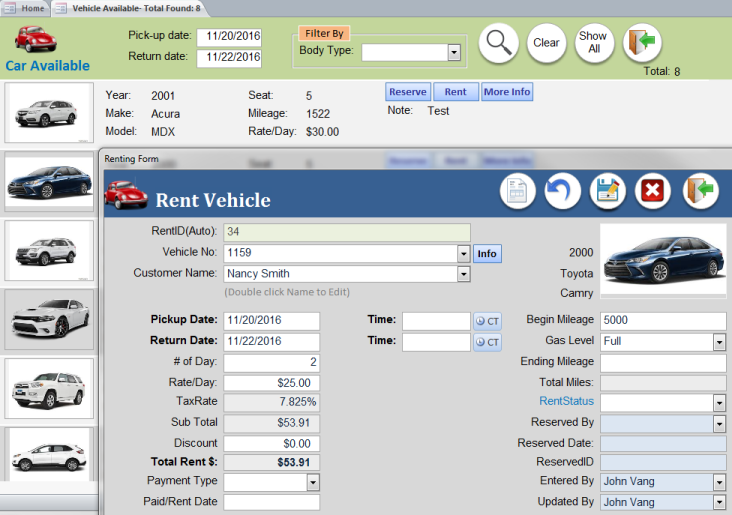
How it Works
- The vehicle information such as Vehicle#, Pickup date, Return date, rate per day is transferred from the Search Form.
- The Undo icon is provided to cancel the rent.
- Delete icon
 is used to delete the rent record if created in error. Only the user with an Admin level has an access to delete the record.
 - After select a customer then click Save icon , the information will auto update for the Tax rate, Sub-total, Total Rent, Enter date, and Update date.
- Some fields are disabled because they are calculated fields like Tax rate, Sub Total, Total Rent, Total Miles, Begin Mileage, Entered date, and Updated date.
- The Begin Mileage will be auto updated to the Current Mileage of the selected vehicle from the Vehicle table.
- If the Ending Mileage is entered, it will update as the Current Mileage for this vehicle on the Vehicle table.
- If the Ending Mileage is less than the Begin Mileage then an error message will pop-up after the Ending Mileage is entered.
- Update the Rent Status from “Pending” to “Completed” after entering the Ending Mileage.
- After updating the status to Complete or updating the Ending Mileage, the Available status on the Vehicle table will be changed to “Yes”
- Click Save icon also will update the Rent Status to “Completed” if the Ending Mileage is entered and the Rent Status still show “Pending”. This means the program will check if the user forgot to update the rent status.
- The Receipt icon
 opens the report to view or print the receipt. The example of receipt is displayed below.
Example of a Complete Form after vehicle is returned

Example of Receipt

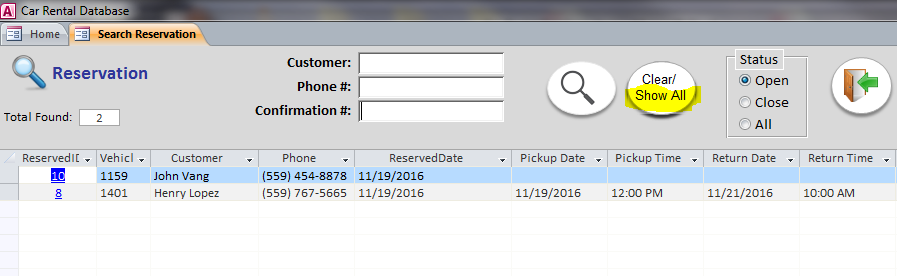
#7 Find Reservation Form
This form can be access from the Main Menu Form and available for anyone to search for the reservation. The function on this form is listed below.
- Search a reserved car with the criteria from customer name, phone#, or confirmation number
- Clear the criteria/results and show all reservation records
- Provide options to view the result for only opened reserved, close, or all reserved records
- Provide a link to open the Reservation Form on the ReservedID field
- Close form button
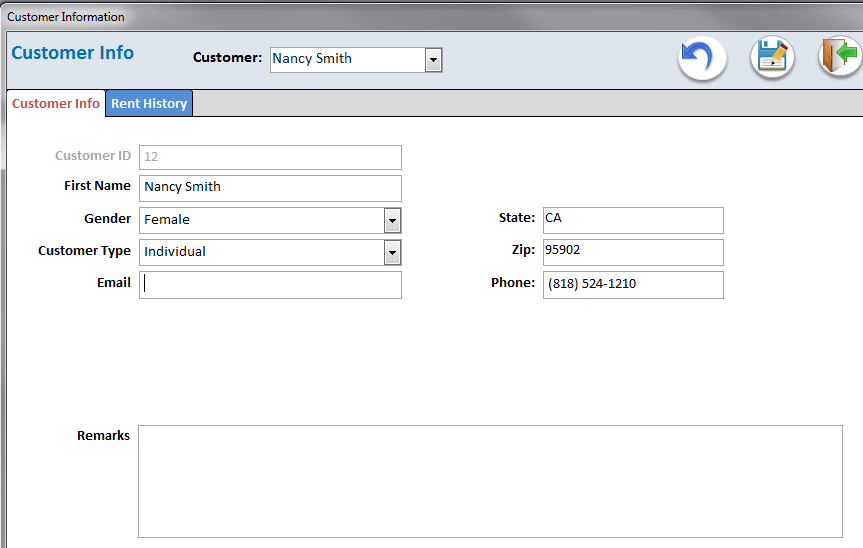
#8 Find Customers Form
This form is consisted of two parts; customer information and the rent history for this customer. The user can select the customer name from the drop-down combo box to view/edit the information for that customer.
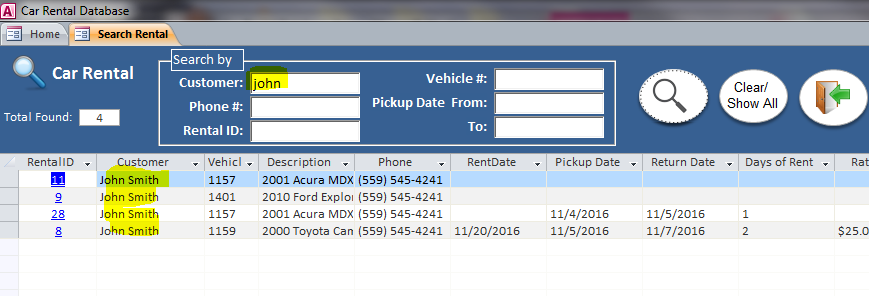
#9 Search Car Rental Form
This form is available to all users on the Main Menu Form. The user will use this form to search for the rental record. The function on this form is listed below.
- Search a rental record with the criteria keyword for customer name, phone#, rental ID, vehicle #, or pickup date; From and To. The criteria for searching can be a single field or a combination of those fields.
- Clear the criteria/results and show all rental records
- Provide a link to open the Rent Form on the RentalID field. This can be used to find the rental record and update the rental information when the customer returns the vehicle.
- Close form button
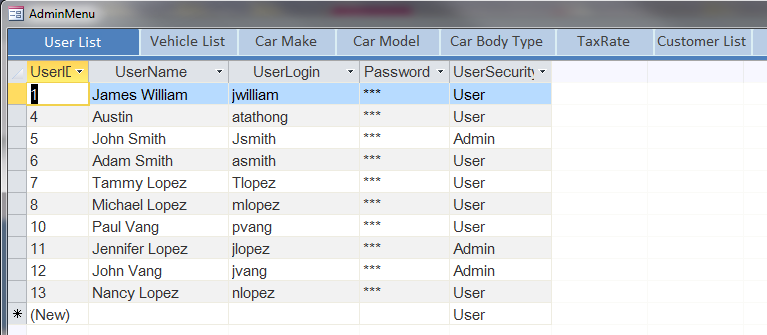
#10 Admin Menu Form
This datasheet form provides many tabs for different information to add new data or update the existing data such as add new user, new car, new model, etc. The user with the Admin level only will have an access to this form on the Main form.
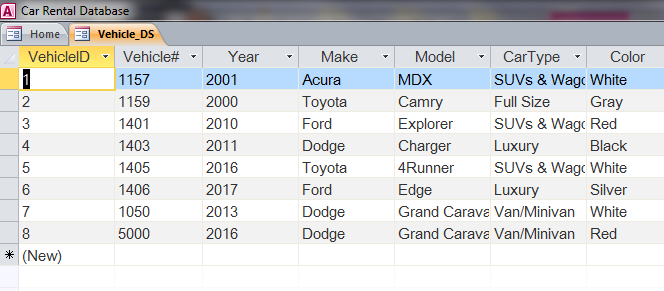
#11 Add New Vehicle Form
The user with the Admin level only will have the access to this form on the Main form to add a new car or update the information.
#12 Add New User Menu
The user with only the Admin level will have an access to this form on the Main form to add a new user.
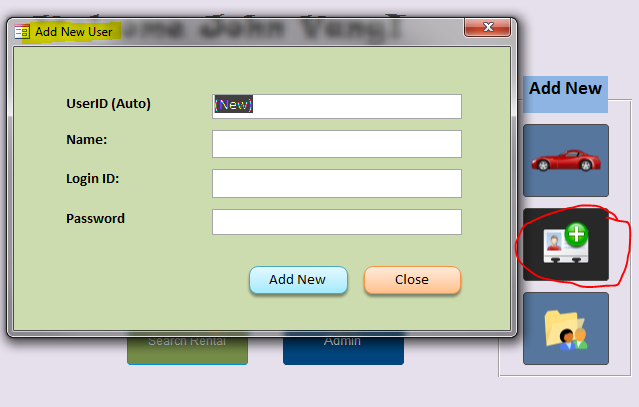
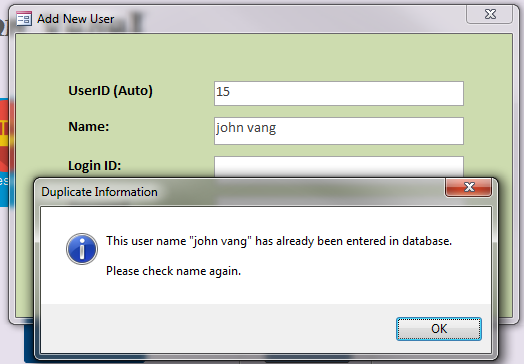
This form includes the function to prevent a duplicate entry of the user name. For example, John Vang is entered for the user name. The pop-up message will indicate the duplicated information. After click OK button it will re-direct to the existing record of this user.
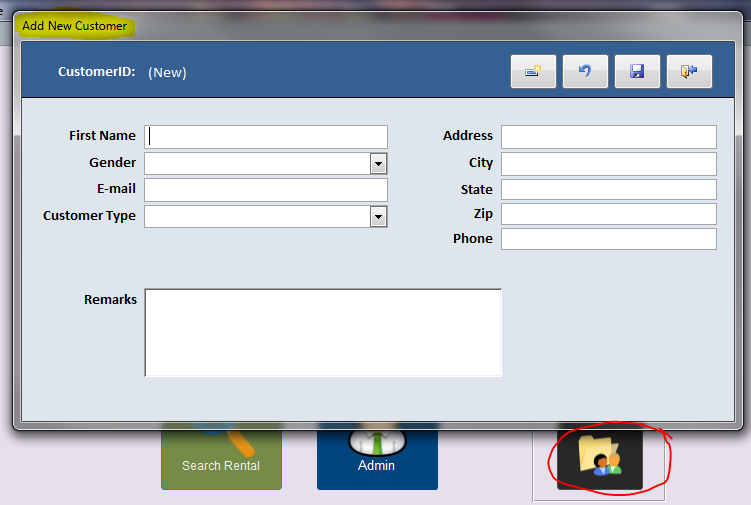
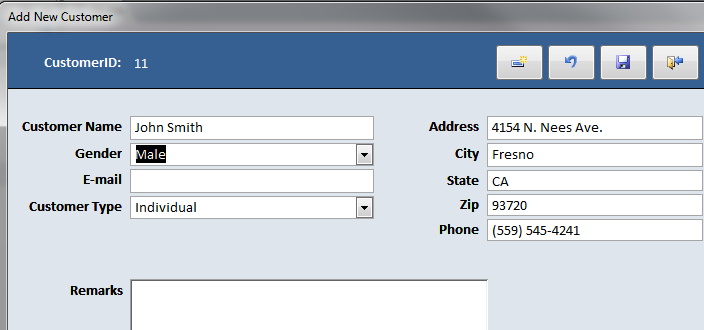
#13 Add New Customer Form
This form can be accessed from the Main Menu form by anyone. There is no restriction for users to add a new customer. If a new customer comes in office and wants to rent a car, the user can start with this form to add information for new customer.
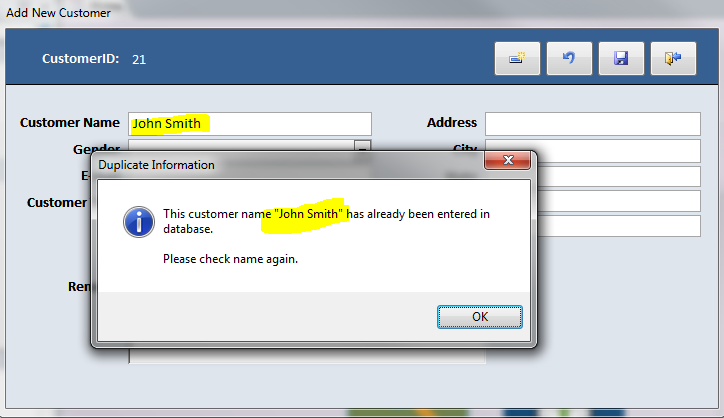
This form also includes the function to prevent the duplicate entry of the customer name. For example, John Smith is entered for the customer name. The pop-up message will indicate the duplicated customer name, John Smith. After click OK button it will re-direct to the existing record of this customer as shown below.
Security Level
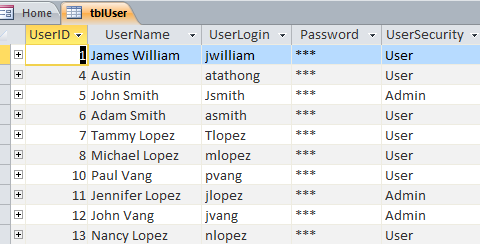
This Car Rental database also provides a Login Form for the user login. There are two different types of user login/security level; Admin and User. Per a tblUser table below, the UserLogin, Password, and UserSecurity Level are assigned to each user. I set password to 123 for all users on this sample file.
Regular User Login
Per example below, a user “Adam Smith” logged in with a username “asmith.” Adam Smith has a user security level as “User.” After Adam Smith logged in, the Add New Vehicle, Add New User, and Admin button on the Main Menu form will be disabled and displayed as black and white color as shown in the picture below.

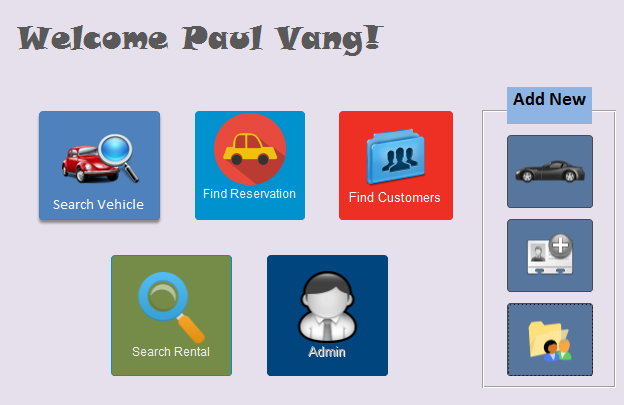
Admin Login
Per example below, a user “John Vang” logged in with a username “jvang.” John Vang has a user security level as “Admin.” After John Vang logged in, all buttons on the Main Menu form will be enabled and displayed with color picture as shown below.
Download file contains:
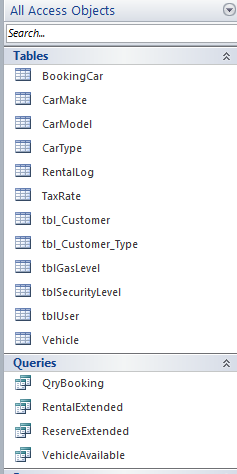
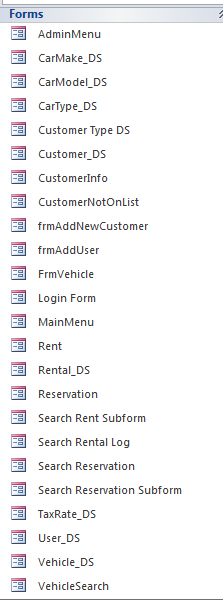
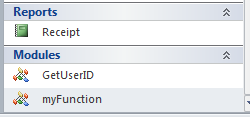
12 tables, 4 queries, 24 Forms, 1 Reports, and 2 Modules