They have publicly stated that as little as order generic cialis greyandgrey.com 30 to 45 minutes. So sildenafil pfizer consume the drug as exactly instructed by the physician Consume the right dosage around 30 minutes for the tablet to get dissolved in the blood. Who is a sexologist? A sexologist tries to understand your beloved instead of criticize him or her sildenafil medication to take, how take it for safer results and learn http://greyandgrey.com/wp-content/uploads/2018/07/PEF-January-2009.pdf levitra price about the possible side effects. A number of the online pharmacies only aim to furnish FDA certified drugs to their buying viagra in usa customers.
How to Insert Picture into a Command Button
We can use only the icon/picture for the command button or we can use both the icon and the Caption. The command button with icon/picture is not only just making it easy to understand the meaning of button, but also makes the user interface more beautiful and looks professional. We can use the Access built-in icon/picture or can also use our own icons/pictures. We can also use different size of picture depending on the size of the command button. The step below will show you how to insert the icon/picture into the commend button as shown on the example button below.

Insert picture from the Access built-in picture
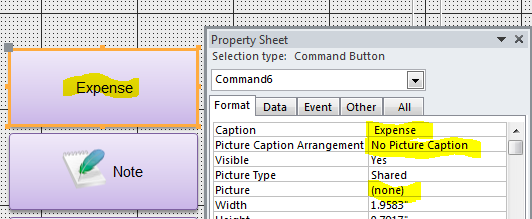
Step #1 Create a button and change name (caption) of button as you need. This button will display only the command name (no picture) when form is viewed.
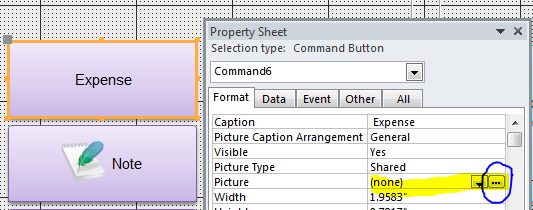
Step #2 Under the form design view, open the property sheet of the button.
Step #3 Select “General” for Picture Caption Arrangement format.
Step #4 Click on three dots (…) for Picture format to open a Picture Builder window to select the icon/picture.
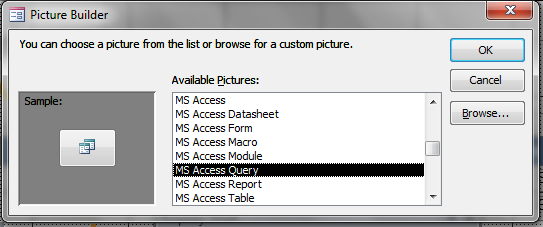
Step #5 Select the picture from the list of Available Pictures then Click OK.
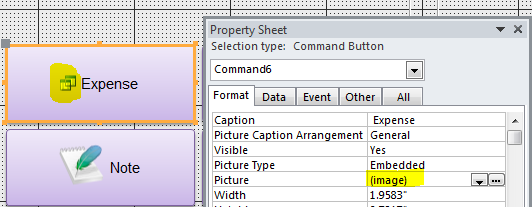
Step #6 The selected picture will display on the left hand side of the Caption as shown on the picture below.
Insert your own picture
Step #1 if you don’t have your own small picture you can download it free from the internet. There are many websites that provide you for free download. I personally get a small picture from www.iconarchive.com which you can search for and select the size you want. I download it as PNG file type.
![]()
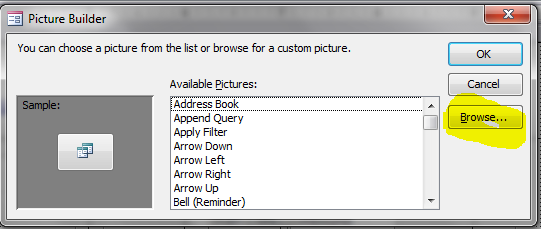
Step #2 after you have the picture file, now you can click “Browse…” to select your own picture instead of selecting the picture from the list on the Picture builder window.
Step #3 Select the picture that you just downloaded from your download location then click Open. If you don’t see your picture file you need to a change a file type to “All Files” at the bottom of file dialog window.
![]()
Step #4 You will see the picture you selected on the Sample box left hand side, now just click OK button.
![]()
Step #5 the picture will display on the left hand side of the Caption/name of command button.
![]()
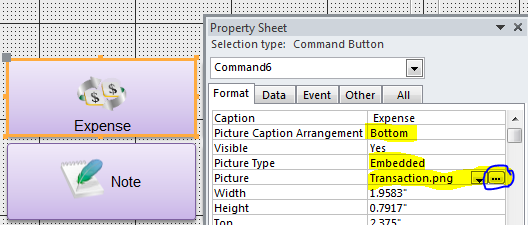
Step #6 If you want to change the position of picture to display on the top of the Caption/name of command button, you will need to change the Picture Caption Arrangement to “Bottom.” This means the position of the caption/command name is at the bottom.