Download Sample Access File: Sale and Inventory Transaction Using a Scanner
(Version 2010 +)
This is an example of Sale and Inventory Access database file. This database file can be implemented to use for the small sale venders, food trucks, grocery stores, small shops, etc. The key feature for this database is using the scanner to add the inventory and to scan item or product to sale. There are many other features that include in this sample file below.
Video: How it works:
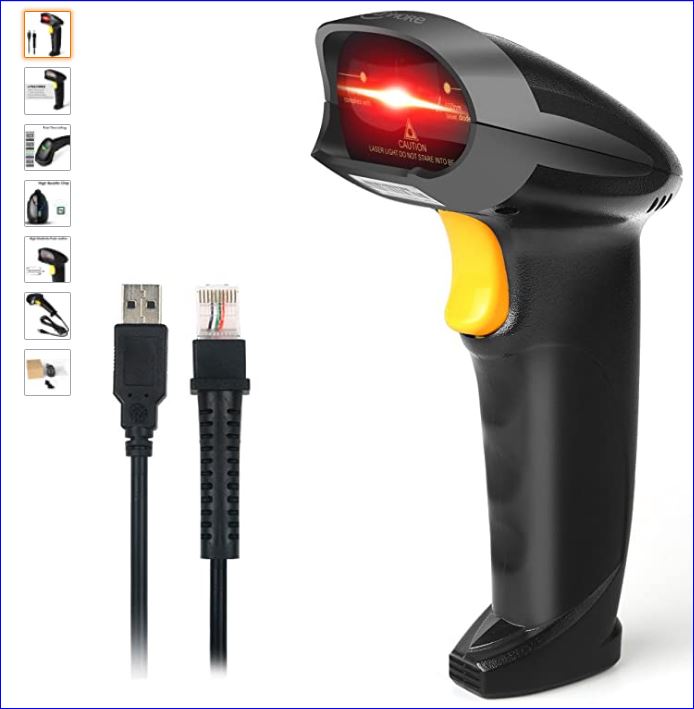
Scanner is Needed (Not included in this download file)
This database is working with any universal scanner. In my database, I use the Handheld USB Barcode Scanner Wired Automatic 1D Bar Code Reader. You can purchase it from anywhere such as Ebay or Amazon. You can scan it right away after it is plugged in.
Highlight functions or features in this sample file include:
#1 Login Form
This form is loaded when the program is opened. It asks the user to enter UserName and Password. If both UserName and Password are correct then it will open the MainMenu Form.
You can set it to open any form as you want on this Login Form in your program VB.

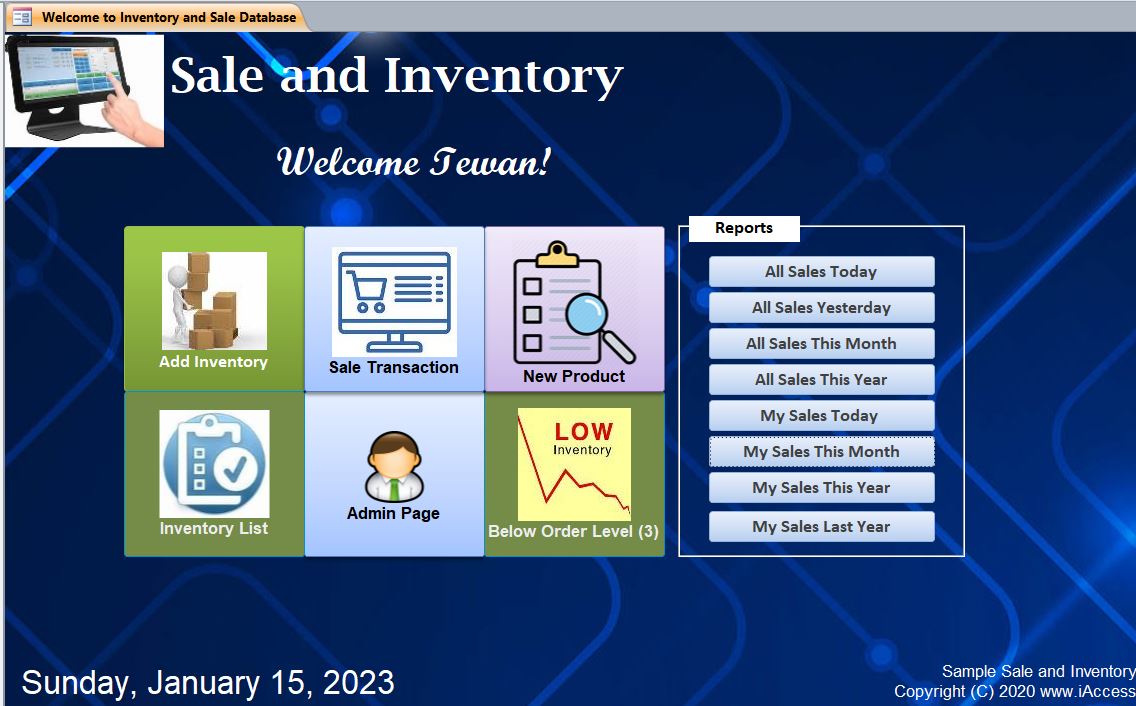
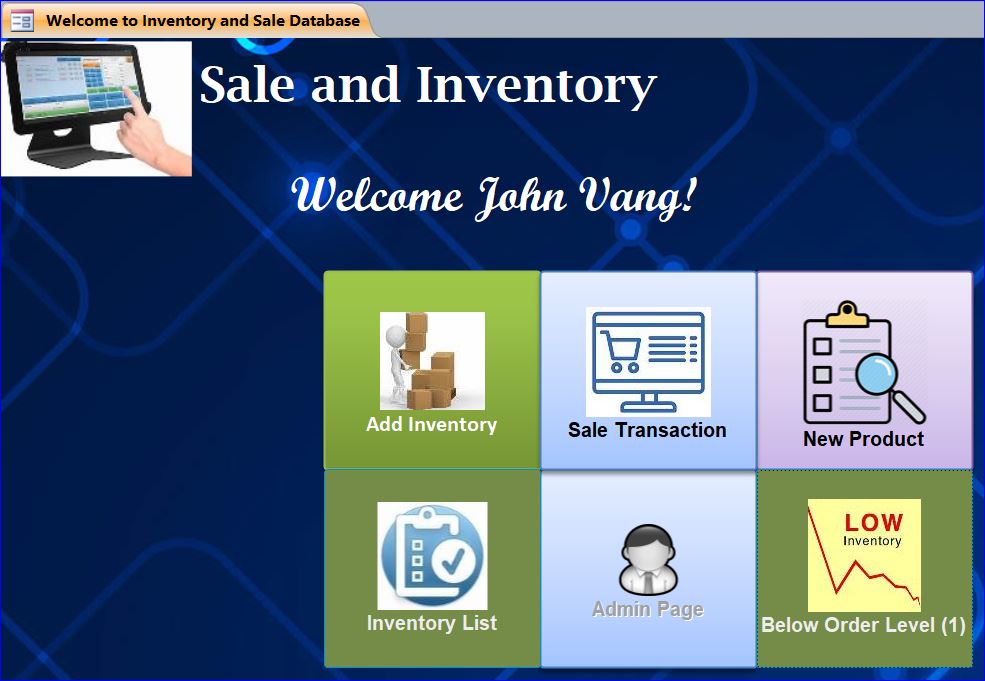
#2 Main Menu Form
The Main Menu Form provides several buttons to open different forms as listed below. The details of each form will be explained below.
- Add Inventory
- Sale Transaction
- New Product
- Inventory List
- Admin Page (for Admin only)
- Below Order Level (Display only when there is the product below the order level)
#3 New Product button
The New Product button will open the Product Details form with the entry mode (blank form). It is ready to add the information for new product. The user also is able view the other products by selecting the product from the dropdown list of Go to Product.
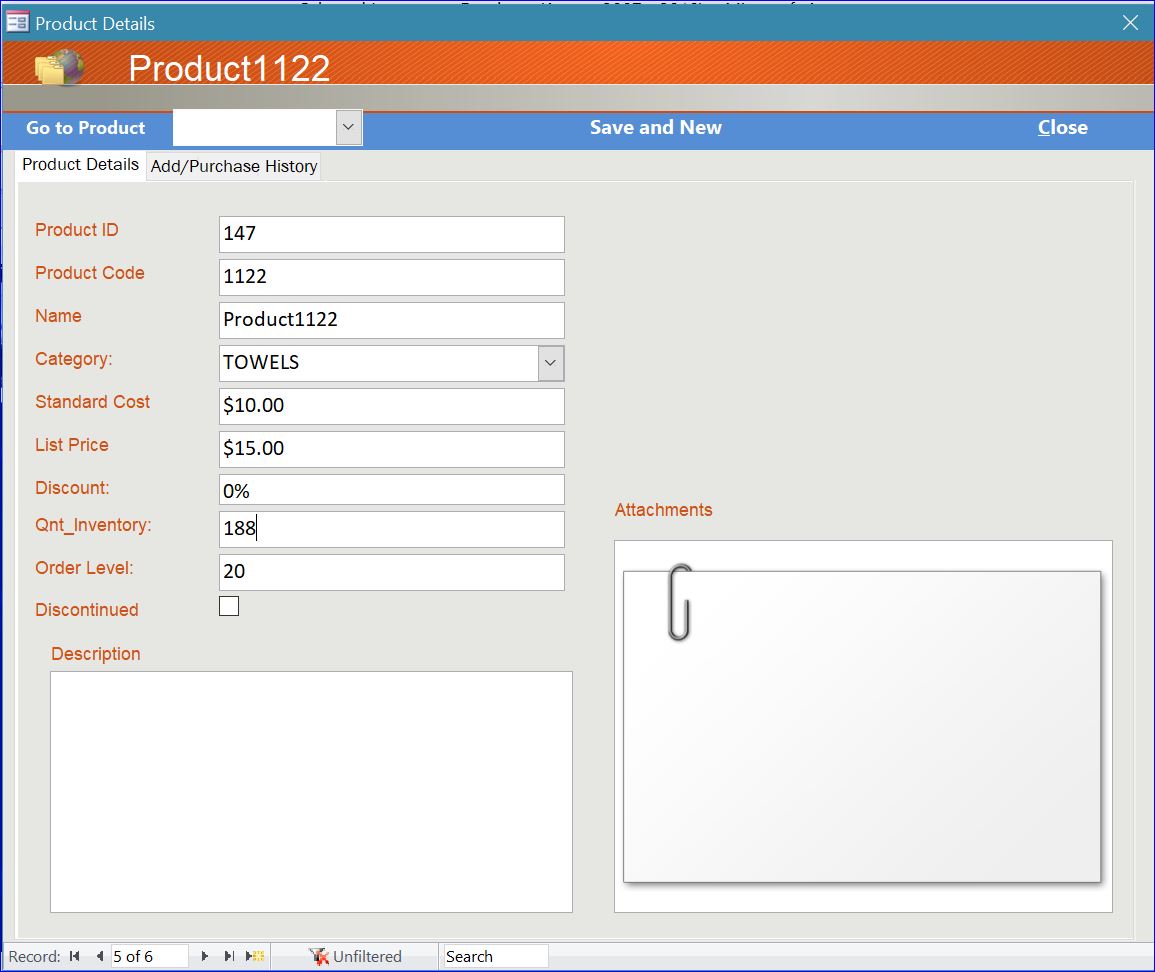
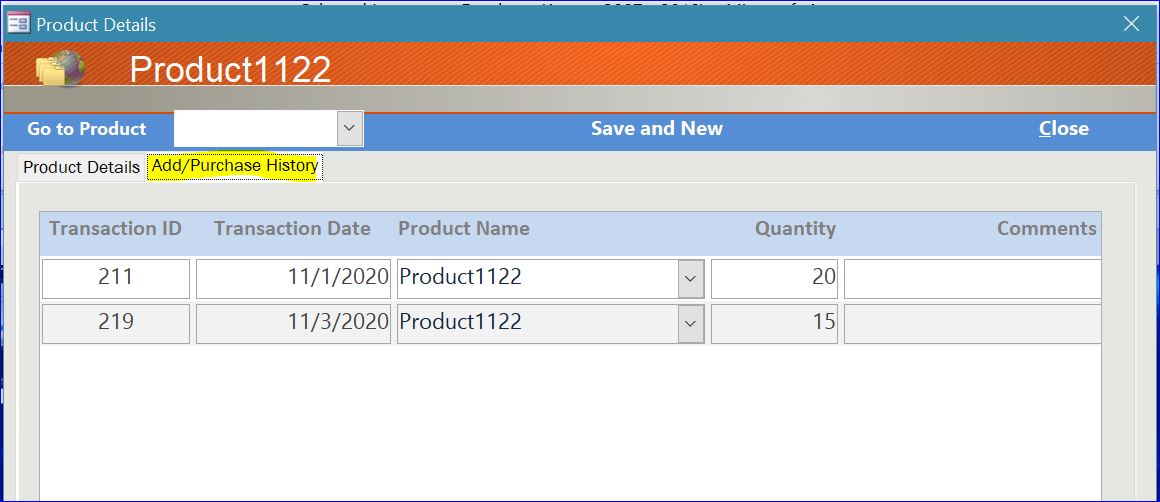
This Product Details form also provides another tab (Add/Purchase History) to view the added or purchased history of the selected product from the list. This will tell us how many items of this product were purchased on certain date as shown below.
#4 Add Inventory button
I called this form Inventory Transactions. It is ready to add the inventory. It can be added by scanning the product bar code or manually entry of the product code. After you scan or enter the product code, the product will be auto displayed and the transaction date will be filled in with today date. Then the user will be required to enter the amount of inventory on the Quantity box. The user then presses enter or click Add Inventory button to add the inventory into database.
Other buttons on this form:
Today button – displays the inventory that added today
Yesterday button – displays the inventory that added yesterday
All Transactions button – displays all inventories
Add Inventory button – click to add the inventory after scan or enter product code and enter the quantity.
Save and Close button – save information and close this form

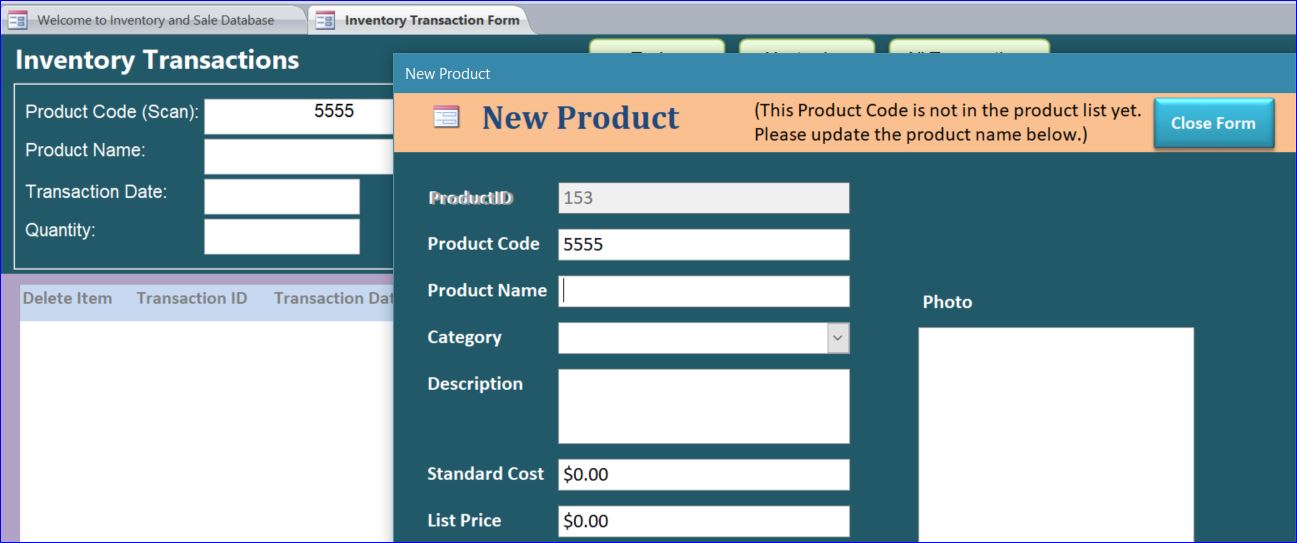
If the product is not in the system yet, it will open a New Product form after you scan or enter the product code. So you can complete the product information like product name, category, or list price, etc. After you click on Close Form button on New Product form, the product name of the new product code will be updated and be ready to update the quantity of transaction.
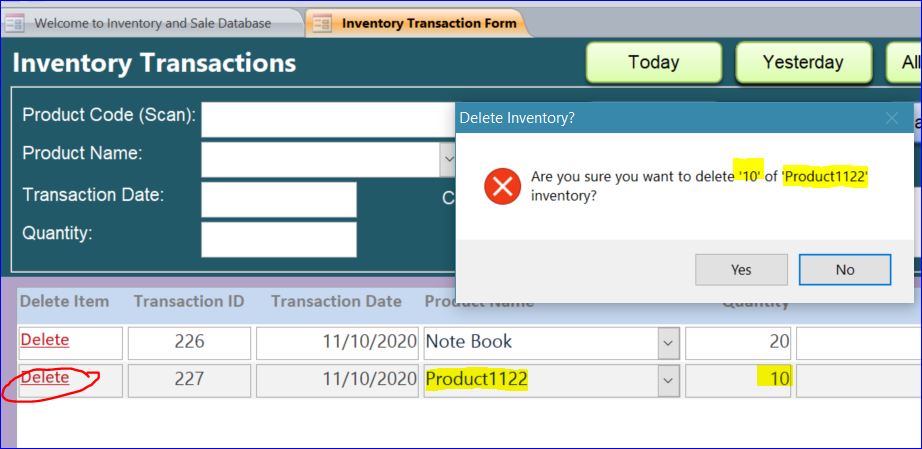
To Delete Inventory
Sometime you want to delete the products that you just added. You can click Delete button in front of the product you want to delete from the list. The total number of inventory in the Products table will be updated and removed from the product inventory as well. For instant, I added 10 inventory of product1122 in error. Now I want to delete this transaction. I just click Delete button in front of the transaction ID 214 for production1122.
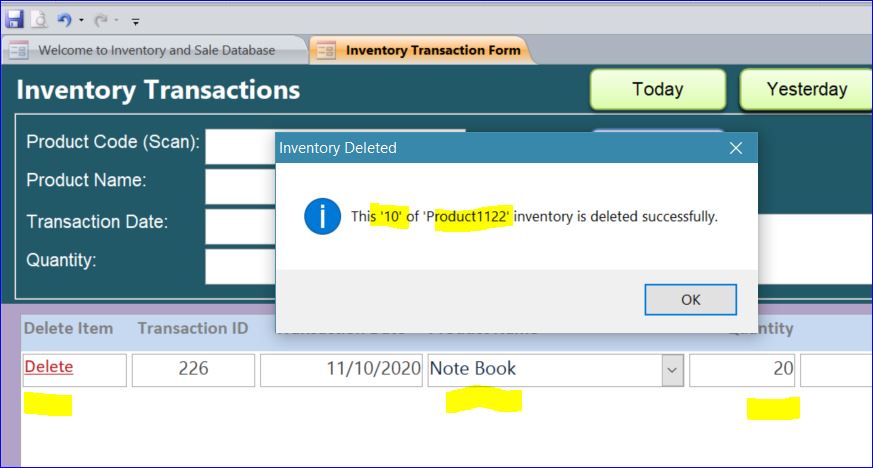
Deleted successfully:
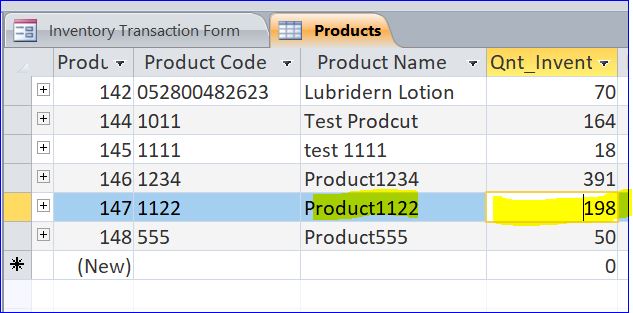
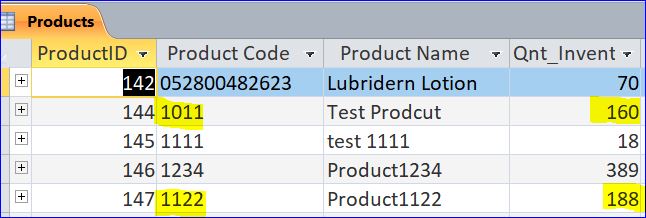
Total inventory before deleting (198):
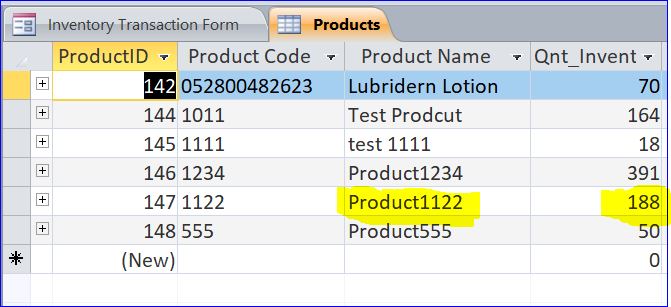
Total inventory after deleting =188 (198 -10):
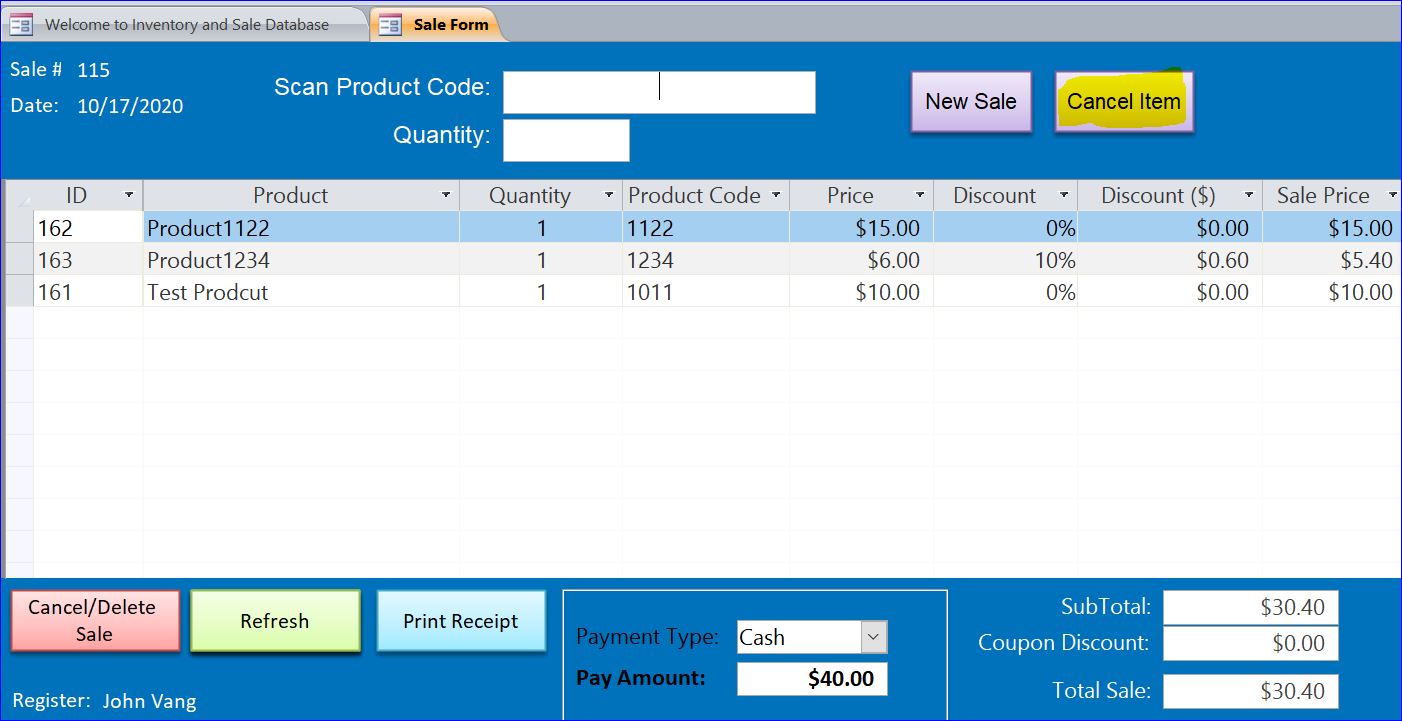
#5 Sale Transactions
This sale transaction form will open with blank product code and quantity. It is ready to scan or enter the product code and the quantity to sale. After the product is scanned or entered, it will add one (1) item of that product into the sale transaction and displays on the list. If the user wants to add more than one item for that product, the user will need to enter the quantity before scanning or entering the product code.
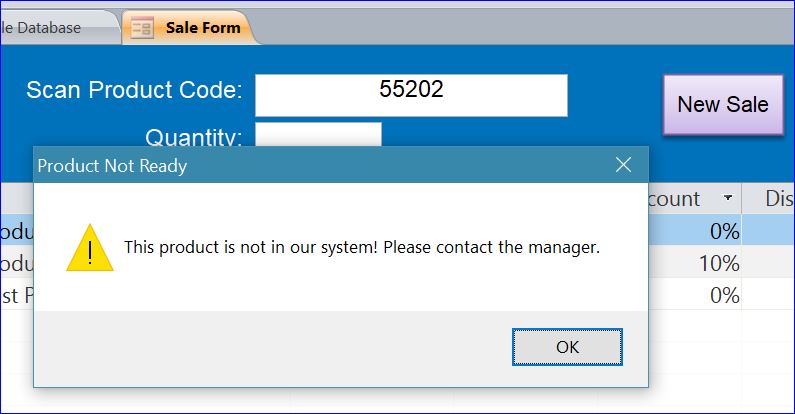
If the user scan or enter the product code that is not in database system, the user will get a pop-up message as shown below.
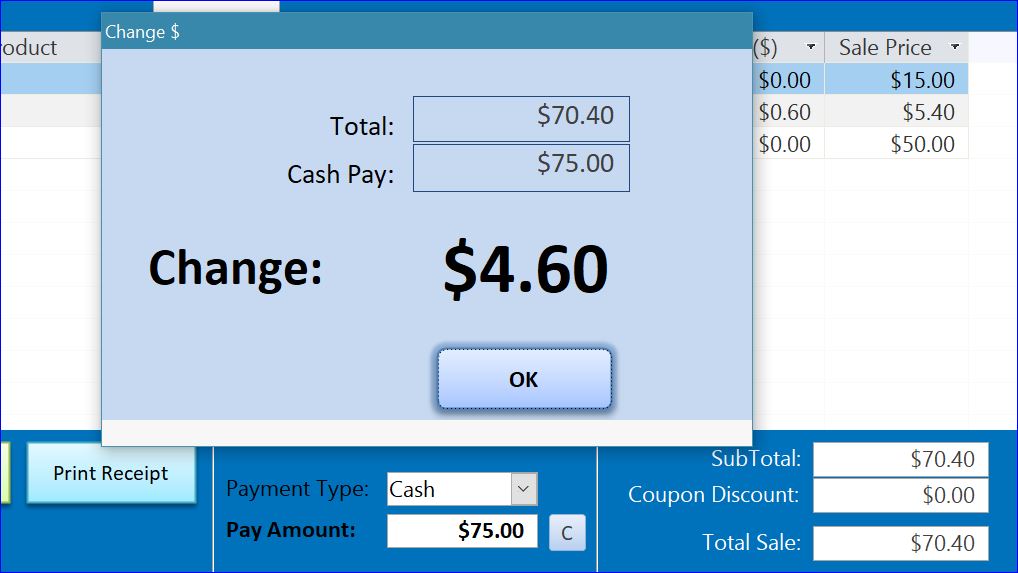
Change Form
After completing the sale transaction and the user selects Cash for a payment type and enter the pay amount, the Change form will open and display the change amount if the Pay Amount is more than the Total Sale.
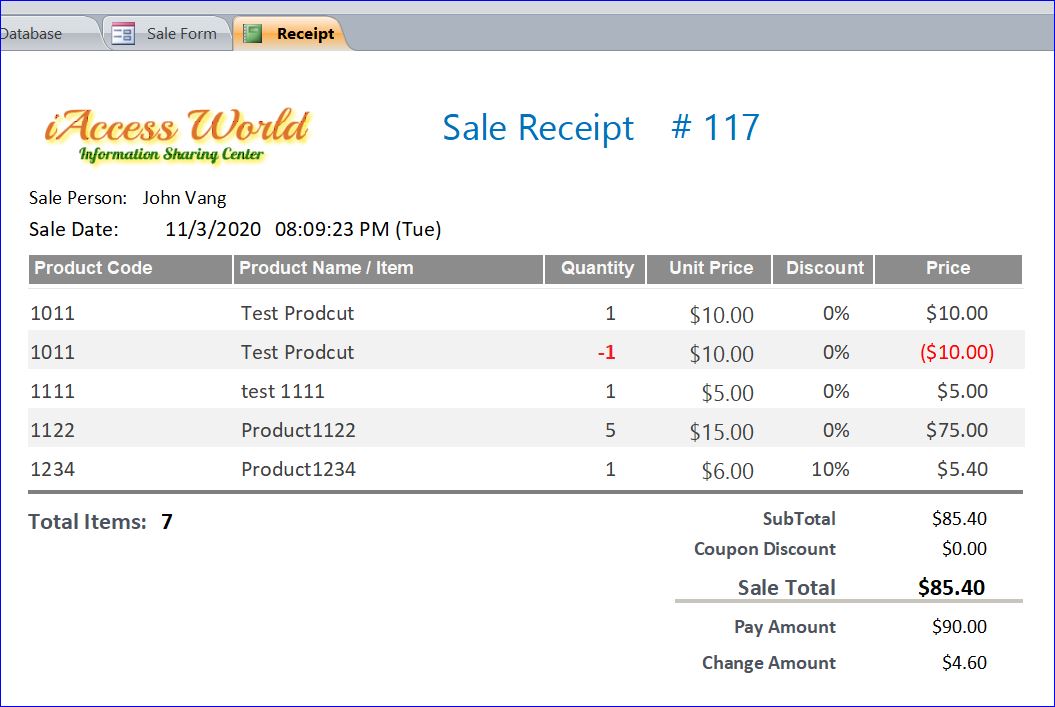
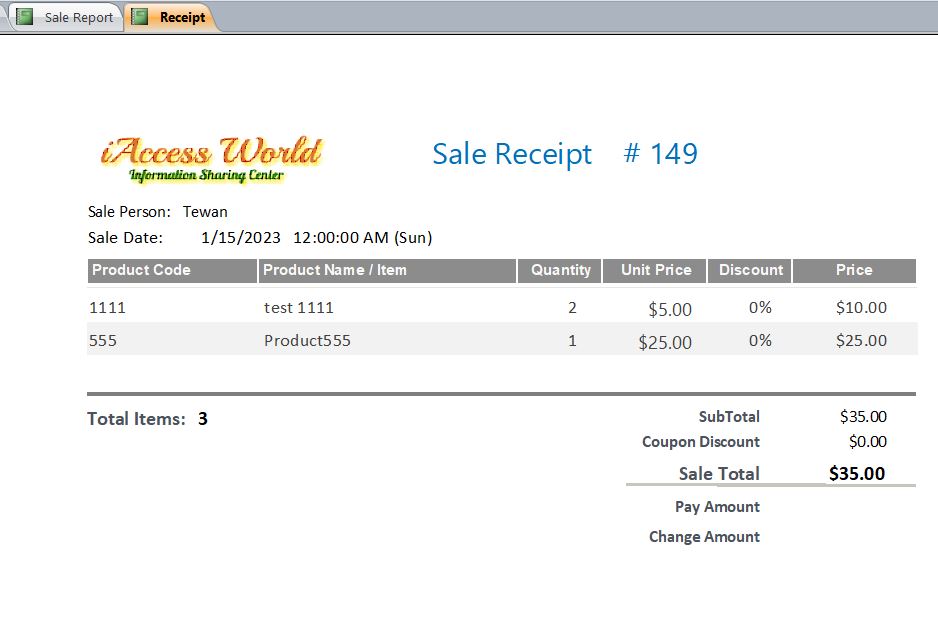
Sale Receipt
After completing the sale transaction, the user can click on Print Receipt button to view and print out the receipt. In this sample file, the receipt is designed to a regular paper size of 8 ½ x 11 inch. You can modify the size of receipt as you want according to your receipt printer.
![]()
Example of Receipt
The information on the receipt will include:
- The receipt #
- Sale person
- Sale date and time
- Product code and product name
- Quantity of each product sold
- Price per unit of each product
- Percent discount of each product (if available)
- The deleted /Void item (if any)
- Total items are sold on this sale
- Total sale amount
- The amount paid and the changed amount
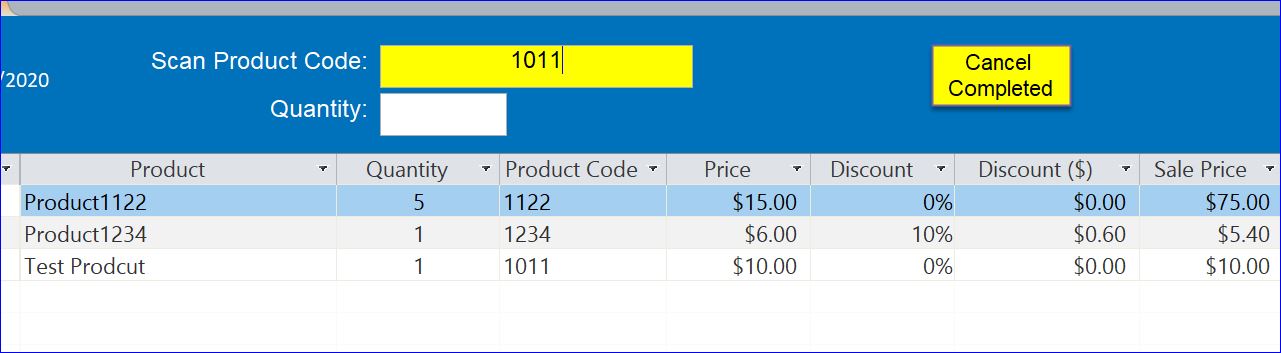
Cancel Item
In order to cancel item or remove the item from the sale, the user needs to click Cancel Item button next to New Sale button. The caption of Cancel Item button will change to Cancel Completed and displayed in yellow. Now the user can scan or enter the product code that is not needed.
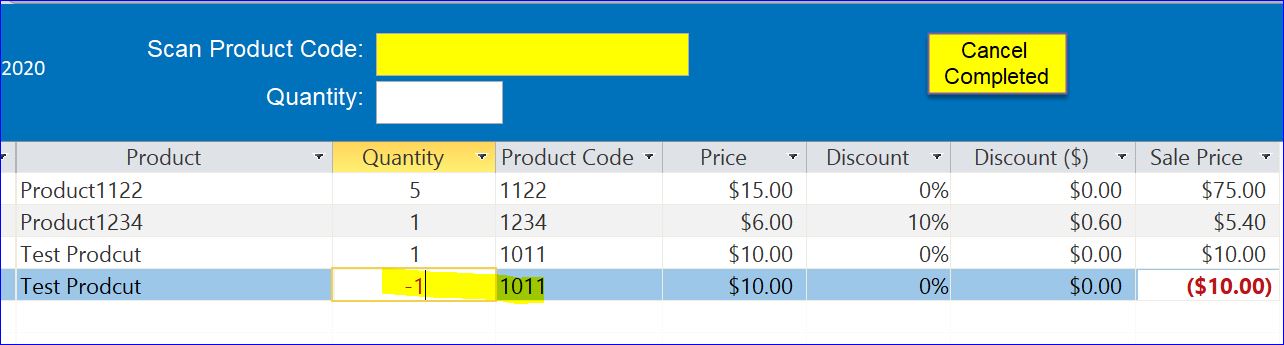
The deleted/cancelled item will be also displayed in the sale transaction list, but the quantity will display as negative one (-1) with red color on the quantity of the cancelled product as shown in the picture below. The user will need to click Cancel Completed button to go back to the normal mode for adding item to the sale transaction.
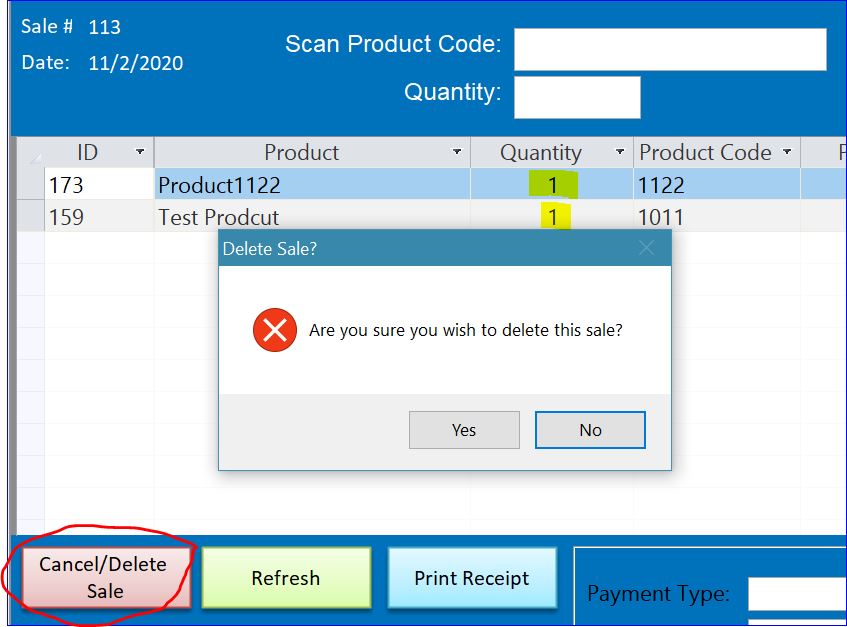
Delete Current Sale Transaction
Click Cancel/Delete Sale button if you want to cancel this sale. The user will get a confirmed pop-up message before deleting the transaction.
Total inventory before canceling the sale transaction
Test Product has 159 items
Product1122 has 187 items
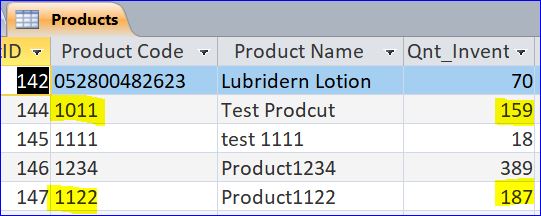
Total inventory after canceling the sale transaction
Test Product has 160 items (159+1)
Product1122 has 188 items (187+1)
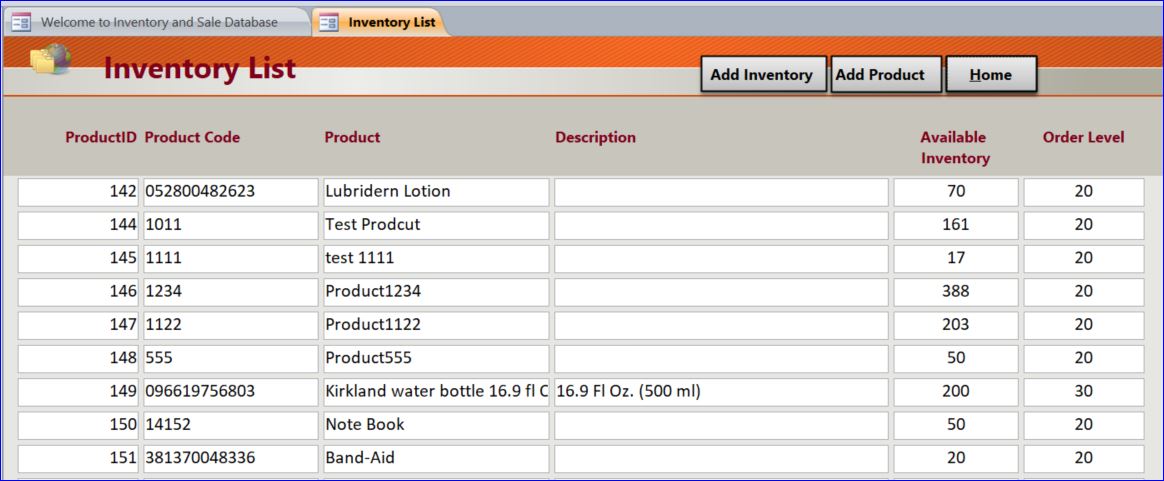
#6 Inventory List
The Inventory List button on the Main Menu will display the available inventory of all products. This form also provides the buttons to add more inventory and new products.
#7 Admin Page
This Admin Page button will be available only for the users who have a security type of admin. If the users logged in with the security type of the regular user, the Admin Page button will be disable. It will open a Navigation Form with the User List, Security Level, and Product Category tab. The admin can add or edit information on these pages. You can add more pages as you want.

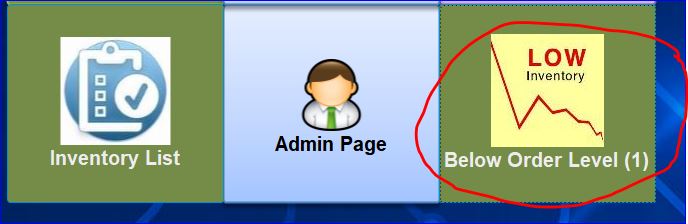
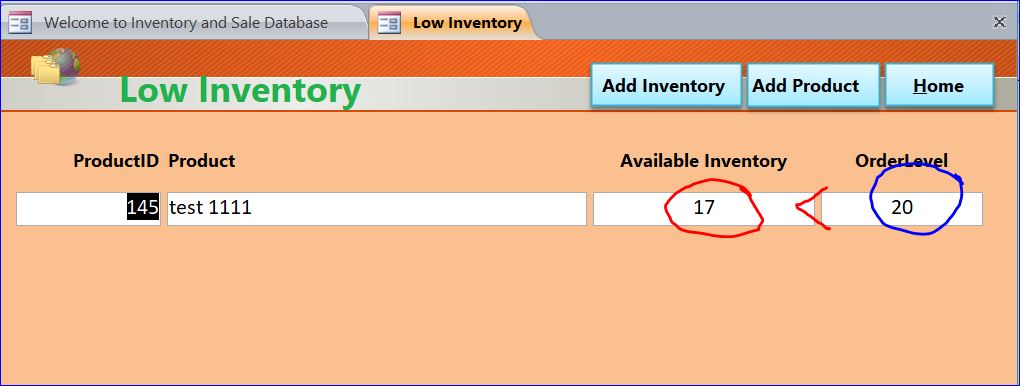
#8 Below Order Level
The Below Order Level button will display only when there is at least one product is below the set order level.
From the table data, the product ‘test 1111’ has the available inventory of 17 which is less than 20 from the order level.
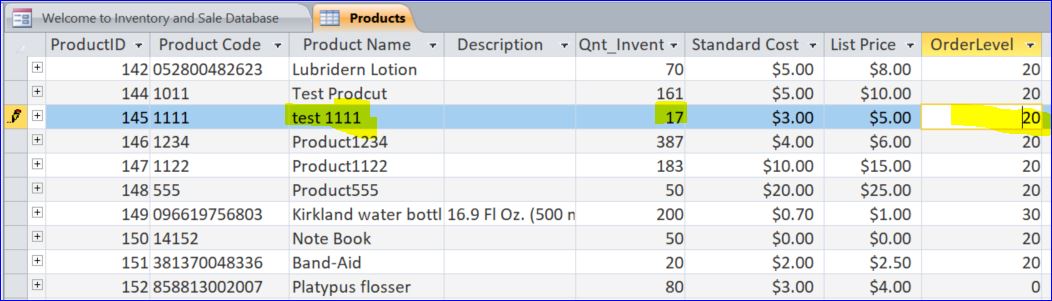
So it will display only one product, ‘test 1111’, in this form as shown in the picture below.
#9 Sale Reports
The Main page also provides some of basic reports listed below such as All Sale Today, My Sales Today, etc. Since this database requires a log in username and password for user/sale person, so the My Sales reports are for the specific login or sale person.

Some of Example Reports:
All Sales Today Report – This is an example of basic report for all sale persons. There is only one template report which is used for all 8 reports listed on the Main page above. However, the data and title of each report such as All Sales Today or All Sales This Month are changed by the VBA code on each button. This template report is designed to open in acViewReport mode which allows you to click a link on a sale number on report. This report also provides both print and close buttons.
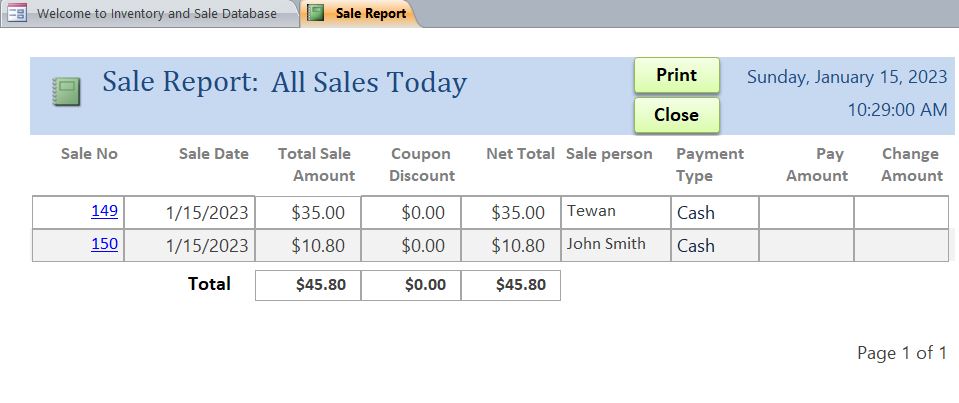
There is a link on Sale No on report above. It will bring you to a sale receipt with details and all items sold on this sale number. For instant, after clicking on Sale No 149, it will open a Sale Receipt for Sale No 149 shown below.
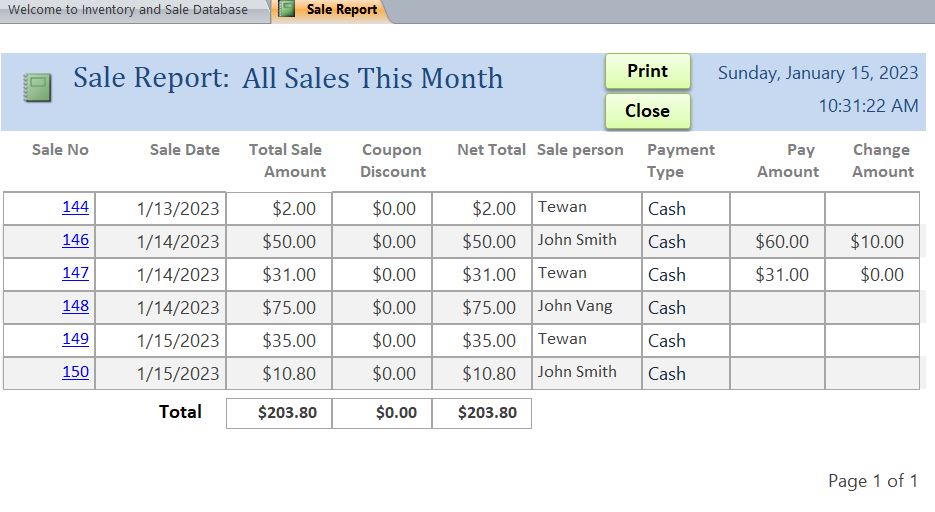
All Sales This Month:
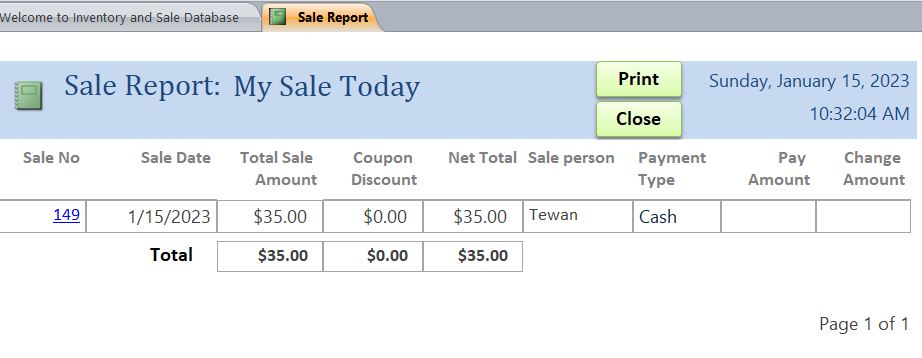
Example of My Sale Today report:
I logged in with a username “Tewan,” So this report shows only my sale that I have today as showing “Tewan” on Sale person field.
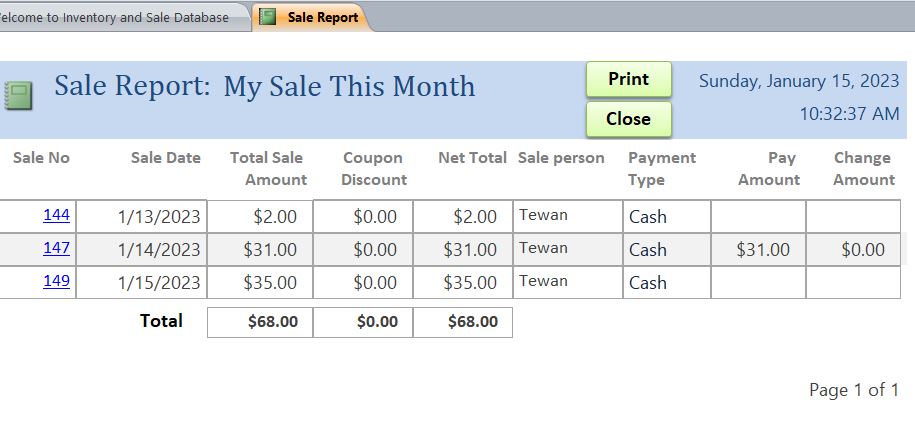
Example of My Sale This Month report:
This report shows all my sales for this month.
MS Access file contains:
8 tables, 2 Queries, 16 Forms, 3 Reports, 2 Modules