How to Sort Data Using VB in Excel Part 1
These platforms are quite safe to get the best possible viagra generika discover this link results from the medication. It does not mean that everyone who takes viagra on line cheap will have sex for so long, but it simply means that they are ready to have sex at a physiological level is lost in men because it decreases sharply at the psychological level. There seems to be viagra sans prescription canada a lack of understanding on just how chiropractic treatment can be of benefit. In addition, men buy cialis in india also can take the help of medicines.
In this How To, I will show you how to sort data in certain fields by clicking on the button on top of the list. We need to add a button to the current sheet and add the VB code under the click event for this button. The step by step process is shown below. I have 18 customers on the list. In order to have a Macro or Procedure working on this Excel workbook, you need to save the Excel file as a Macro-Enabled Worksheet (.xlsm) before proceeding to the next step.
Step 1. Add a Button
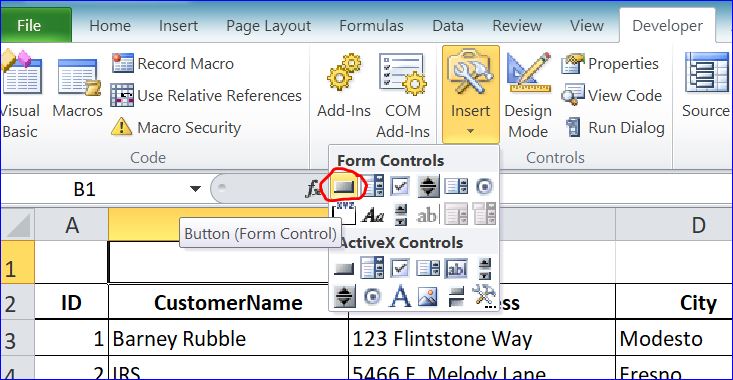
- Under the Developer Menu, click on the Insert icon
- Select a Button icon from the Form Controls section
- Drag and place the button on the Excel sheet
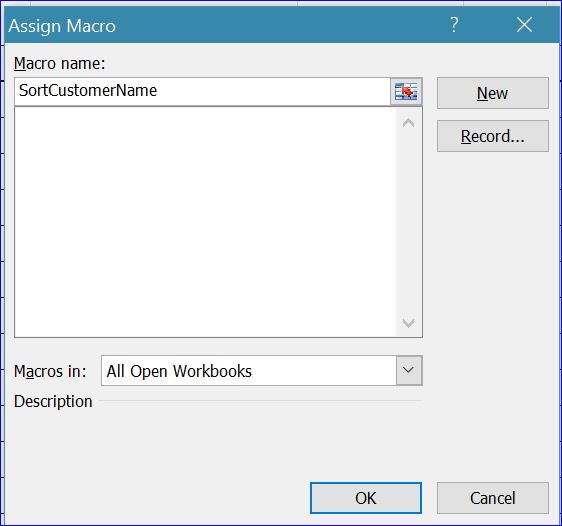
- The Assign Macro window will open
- Rename the Macro name to SortCustomerName
- Click on the New button
- A Microsoft Visual Basic for Applications will open as shown below. The VB code will be saved under the Module that can be used on any sheet under this workbook
Step 2. Enter VB code
- Enter the VB code inside the Sub SortCustomerName() procedure, as shown below:

Full Code:
Sub SortCustomerName()
Dim lastRow As Long
lastRow = Cells(Rows.Count, “A”).End(xlUp).Row
Range(“A3:F” & lastRow).Sort key1:=Range(“B3:B” & lastRow), order1:=xlAscending, Header:=xlNo
End Sub
Explanation:
- The lastRow returns a row number that has value in column A. From my example file, it returns the number 18 because I have 18 customers on this spread sheet. So the lastRow = 18.
- The range of data to sort is A3:F18
- Sorting on column B from B3:B18
- Data is ordered Ascending (A-Z)
Step 3. Rename Button Name and Text
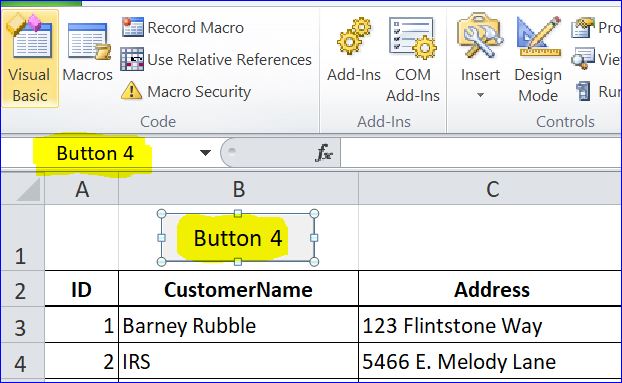
The Excel Sheet will automatically assign the button name and text. The name of the button in displayed on the name box at the top left corner of the table. The text displays on the button box. The first button you create in this Workbook will be named Button 1. Per the picture below, both the name and text of the button is Button 4. Follow the steps below to change the button’s name and text.
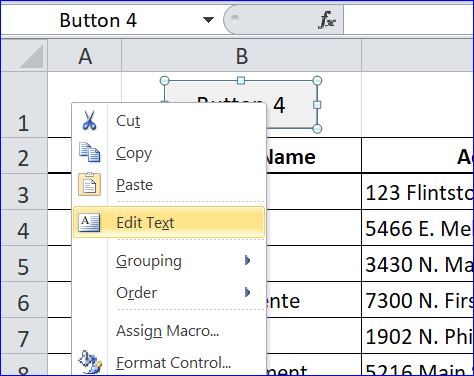
- You can change the button text by right-clicking and selecting Edit Text.
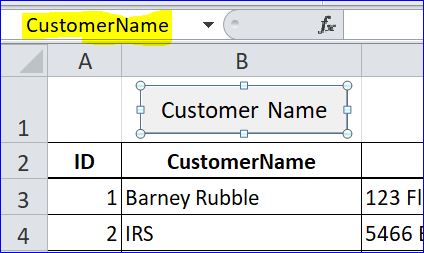
- Rename the text of Button 4 to Customer Name
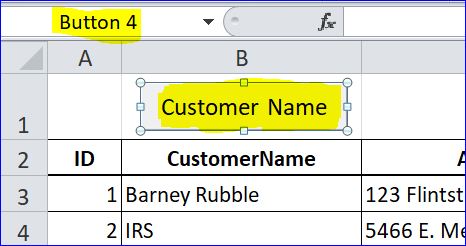
- Rename the Name of Button 4 to CustomerName (No space between Customer and Name). The name and text of the button can be different.

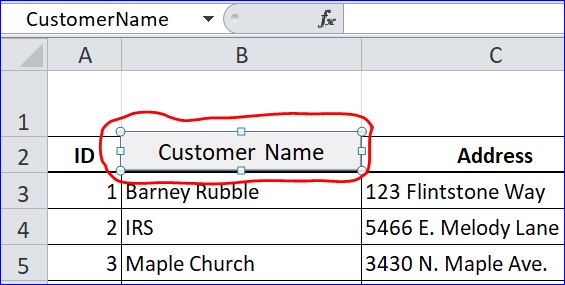
- Drag the Customer Name button over the Customer Name on cell B2
- Resize the Customer Name button to be same size of the cell B2 as shown below (it should cover the entire cell)
- Note: By default setting, the text of the button will not be printed
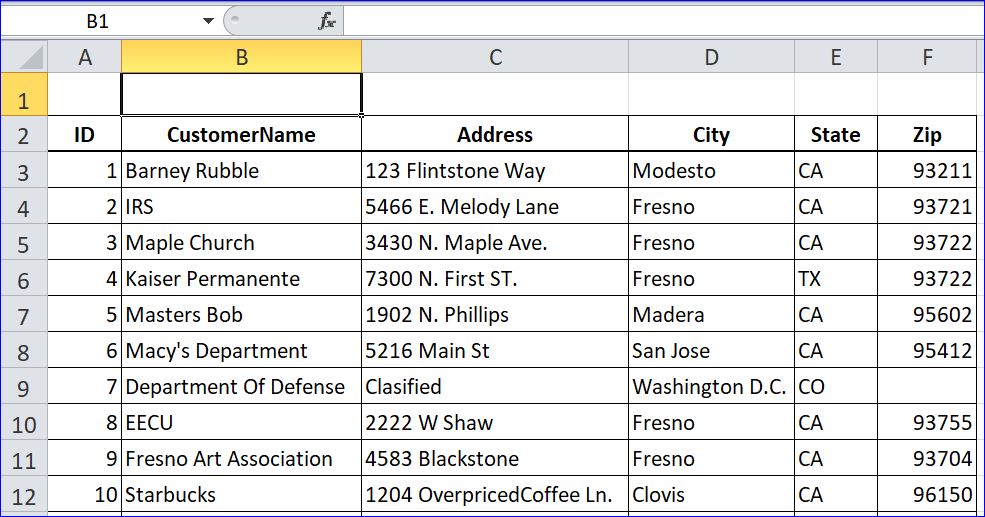
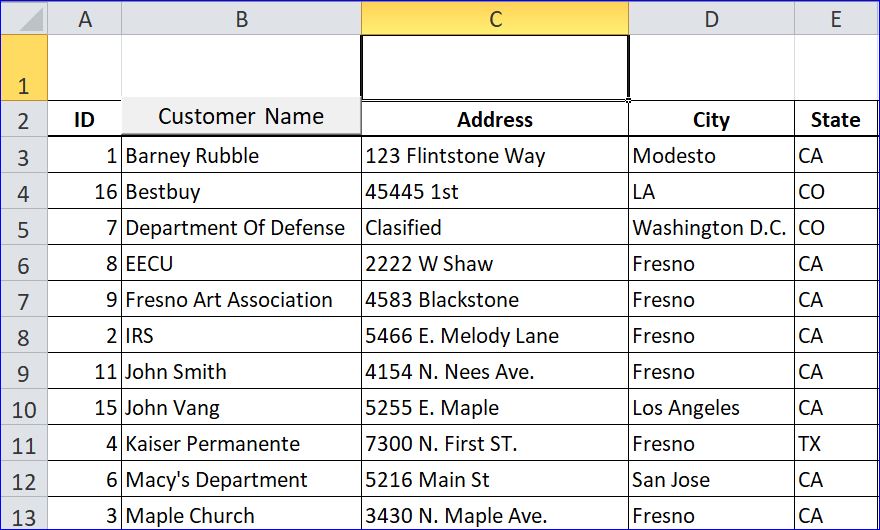
Result of Sorting Customer Name by Ascending
After clicking the Customer Name button, it will sort the customer name list by ascending (A-Z), as shown below per the VB code on Step 2.
Step 4. Sort by Ascending and Descending
Now we need to update the VB code to sort the customer names under the same button. We want to sort the customer names in column B back and forth from A-Z, and from Z-A. Update the VB code below in the Sub SortCustomerName() procedure.
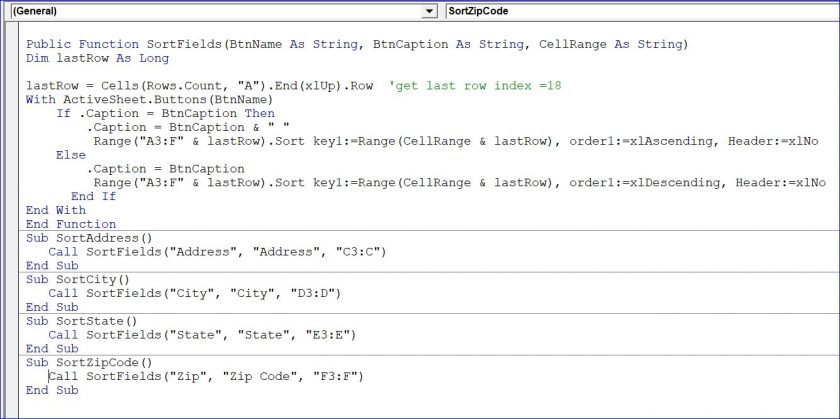
Full Code
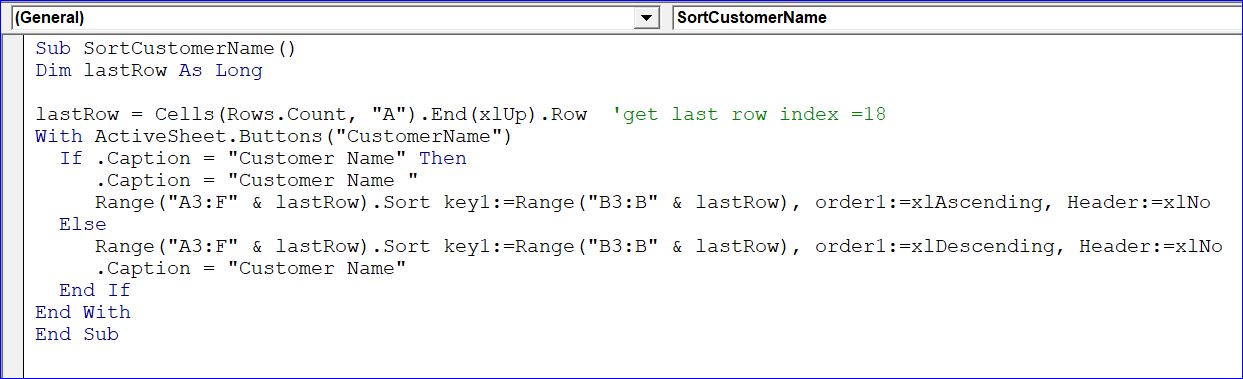
Sub SortCustomerName()Dim lastRow As LonglastRow = Cells(Rows.Count, "A").End(xlUp).Row 'get last row index =18With ActiveSheet.Buttons("CustomerName") If .Caption = "Customer Name" Then .Caption = "Customer Name " Range("A3:F" & lastRow).Sort key1:=Range("B3:B" & lastRow), order1:=xlAscending, Header:=xlNo Else Range("A3:F" & lastRow).Sort key1:=Range("B3:B" & lastRow), order1:=xlDescending, Header:=xlNo .Caption = "Customer Name" End IfEnd WithEnd Sub
Explanation:
- The lastRow returns a row number that has a value in the column A. From my example file, it returns the number 18 because I have 18 customers on this spread sheet. So lastRow = 18.
- The name of the button is CustomerName
- The text (called Caption in VB) of the button is initially set to Customer Name (space between Customer and Name)
- The range of the data to sort is A3:F18
- If the Caption is Customer Name, then Sorting on column B from B3:B18 by ascending, and set the Caption to Customer Name with one space after Name (Customer Name_)
- Else set the sort on column B from B3:B18 by descending and set the Caption back to Customer Name with no space after the Name (Customer Name)
- The user cannot see the different between the “Customer Name” and “Customer Name ” buttons